Menu

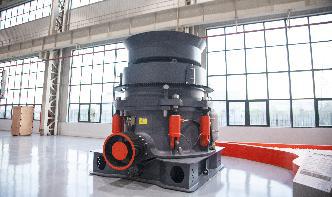
هل تبحث عن كسارة أو صانع رمال أو مطحنة مشروعك؟

Operation in horizontal or vertical position has been foreseen; operation of the brake in vertical position is encumbered with only insignificant residual torque. The electromagnet winding of the brake is designed for operation in Class F insulation.
Kitchen Hoods • Type I and Type II 1 Installation, Operation and Maintenance Manual Please read and save these instructions for future reference.

All personnel involved in the operation, installation, inspection, and maintenance of the unit must be qualified to carry out the work involved. If the personnel in question do not already possess the necessary knowledge and skill, appropriate training and instruction must be provided.

Install the threaded rod into the hood hanging angles and use heavyduty nuts to secure the connection. 7. Caulk the seams between the wall and the drop down plenum assembly.
Installation Instructions New systems come with the cartridges and outlet connector preinstalled. Installer should verify this during installation. 1. Please confirm that all items required are included in the kit ready for assembly and remove from carton. 2. Find a suitable location for the OneFlow+ system keeping in mind access to the

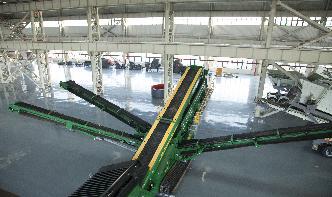
Installation, Operation and Maintenance Page 6 Rev. 9/11/13 17) Route the cable under the bottom sheave, along the drive over channel and under the bottom sheave of the opposite column, and reassemble. 18) Remove the cable trapping bolt assembly, Fig 7, on the top sheave. Route the cable up through the carriage and over the sheave.
4 Long threaded retaining rods 4 Short threaded retaining rods 1 Converter (M Series or L Series) 1 Calibration Certificate 1 FPIX Mag Installation Operation and Maintenance Manual 1 Converter Installation Operation and maintenance Manual 2 9/16" or 3/4" reversible ratchet wrench 2 Pipe thread sealant 16 Hex nut (3/8" or 1/2") 8 Locking cotter pin
The maintenance of public hydrants is a shared responsibility between the Water Division and Fire Division. If during inspection or operation, a public hydrant is found to be inoperable, or in need of major repairs, the hydrant should be reported to the Water Division and bagged.

installation, operation, and maintenance instructions for its Cooper Power™ series VR32 voltage regulator with the QuikDrive™ tapchanger. Read this manual first Read and understand the contents of this manual and follow all locally approved procedures and safety practices before installing or operating this equipment. Read and
installation, operation, and maintenance fit the actual well conditions over the entire life cycle of a well. ISO/FDIS 10423 defines a wellhead as "all the permanent equipment between the uppermost portion of the surface casing and the tubing head adaptor connection" .
Model VIT Installation, Operation, and Maintenance 3 Introduction and Safety Safety WARNING: • The operator must be aware of the pumpage and take appropriate safety precautions to prevent physical injury. • Risk of serious injury or death. If any pressurecontaining device is overpressurized, it can explode, rupture, or discharge its contents.

Installation and Maintenance Instructions Vanessa Series 30,000 Basic Configuration Body Style Double Flanged, Wafer, Lug and Buttweld. Applicable Product Range. • Series 30,000 Basic Configuration, Double Flanged Body Style, which can be installed between two flanges or .
Installation, Operation, and Maintenance of Commercial Kitchen Hoods . TABLE OF CONTENTS ... MAINTENANCE AND OPERATION GUIDE TROUBLESHOOTING ... (Ductwork installation 'By Others.') 9. Threaded rods should be 1/2" closer to the back wall .
Installation, Operation and Maintenance Instructions Introduction The Fairchild Model 4890A volume booster is specifically designed to be used in conjunction with valve positioners on large control valve actuators to provide faster response than possible with the valve positioner alone. Deadband within the operation of the volume

Installation, Operation and Maintenance Manual ... loosen the threaded rod lock nut, unscrew the threaded rod and remove adjusting bracket lock bolt. Then move the adjusting bracket and threaded rod to the top of the clamp blocks (Fig. 2) and tighten threaded .
Installation, Operation, and Maintenance File: 5 Rev: 11/04/14 Installation 1. Locate the lift on a level concrete floor with adequate space on all sides. Minimum floor thickness is 4". Minimum floor strength is 3500 psi. WARNING DO NOT install on asphalt or .
